User Area > Advice
How do I model a hinged connection between shell meshed
surfaces?
Interface
joint elements can be used to connect surface elements (e.g.
shells) without full fixity. This mesh is assigned to the two line
features on the edge of the two separate surfaces (one line is
designated "master" and one "slave"). The gap
between these surfaces could be zero.
The
approach outlined below will enable the generation of (for
example) moment release between surfaces meshed with shell
elements
Where a
connection between two surface features with a coincident edge is
required, a joint mesh can be created between the two parallel line
features. A gap may be temporarily created between the two lines
to aid modelling. A gap may be created, for example, by
making a copy of one surface feature with the
desired offset, and the original surface deleted.
New
Geometry
When
creating the geometry from scratch the points and lines at the
interface must be made "unmergable", so that they are
not automatically merged by LUSAS Modeller if they share the same
coordinate positions. This can be done by selecting the features and using the following
menu items as appropriate:
Geometry
> Point > Make unmergable
Geometry
> Line > Make unmergable
Modifying
Existing Geometry (Example)
In this
case the geometry is already created with lines shared between the
surfaces along X=0. To separate these surfaces and ensure
that they are not connected we need to unmerge the lines and
points between them. This can be done by selecting one point
(eg P47) and one surface (eg. S21) and then go to:
Geometry
> Point > Unmerge
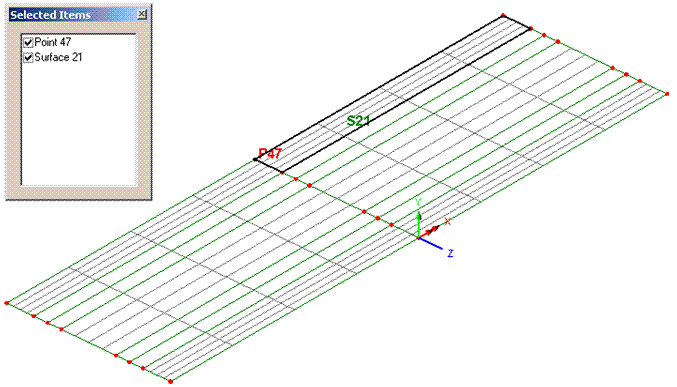
Surface
21 is deleted and replaced by surface 22 as shown. Now line
59 and point 63 only belong to surface 22. The new
coexistent point 47 and line 37 belong to the opposite surface
14. These new features are automatically set as unmergable.

The two surfaces are now only connected at point 41. To
resolve this, point 41, and this time, the line 55 (of surface 22)
are selected and again, go to:
Geometry
> Point > Unmerge
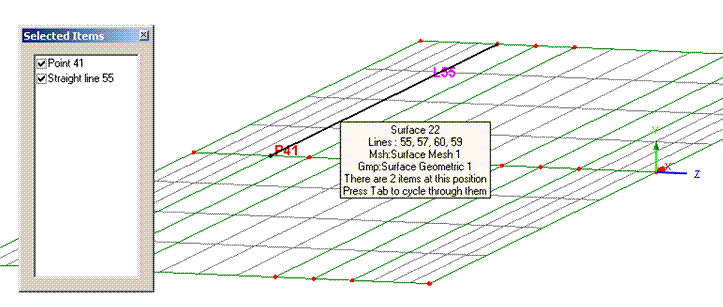
This
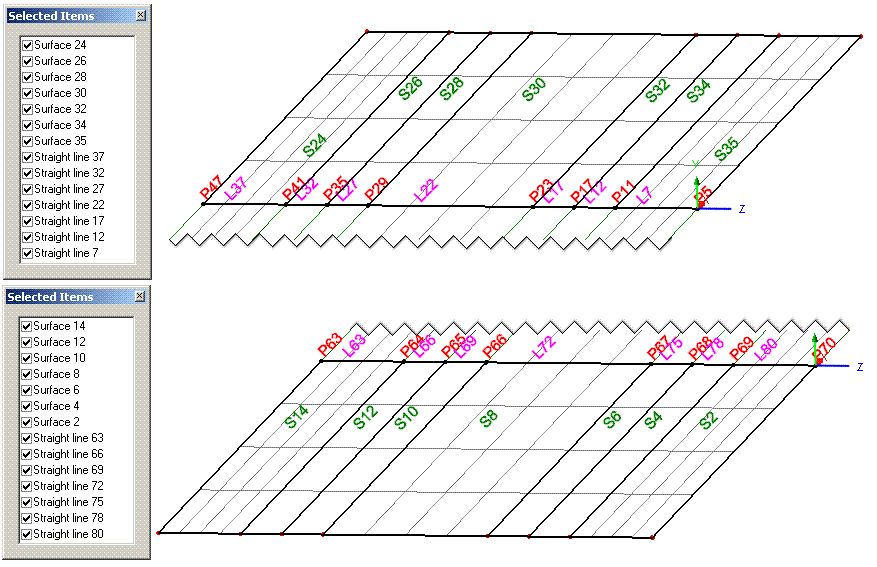
process is repeated, as if unstitching the surfaces, until the
surfaces that meet at X=0 are separated.
Joint
elements have no length in a stiffness matrix and so any length
given in the model may result in a solution that is not in true
moment equilibrium. A warning to this effect will
also occur in the LUSAS Solver text output file (*.OUT), and
echoed to the Text Output window in Modeller. However, moving the
features at each end of joint elements to be coincident can make
it difficult to be sure of the orientation of the joints element
axes (local x, y, z). Therefore it is prudent always to use
a local coordinate dataset to control the axes, which can be
specified when assigning the joint mesh.
Surfaces should be meshed in an appropriate manner, usually using
shell or plate elements.
The
appropriate mesh to connect to all 6 degrees of freedom for thin
shells (QSI4), thick shells (QTS4, QTS8) and 3D beam elements is
"joint for beams 3D" (JSH4). Where no rotational
stiffness is required however, it may be more appropriate to use
"joint no rotational stiffness" (JNT4). This
reduces the input required for JSH4 as the rotational stiffnesses do not need to be
calculated.
A local coordinate dataset to control the
element axes orientation for the joints should be defined before the
joint
mesh attribute is assigned. More information on local coordinates
may be found in the help menu item:
Help
> Help Topics > Contents >
Modeller Reference Manual > Chapter 5 : Model Attributes >
Other Attributes> Local Coordinates
A JNT4
mesh (for no rotational stiffness at all) may be defined using the
menu item:
Attributes
> Mesh > Line > (drop down menus) Generic element
type=Joint no rotational stiffness, Number of dimensions=3
The mesh
definition should include the number of divisions along the lines of the surface
features to be joined.
The mesh
is assigned by selecting one line and adding
it to the selection memory (this will be the �slave� of the
joints). Then the opposing second line is selected and the joint mesh attribute
is assigned by dragging and dropping it from the Attributes
TreeView onto the model in the graphics window. Clear the selection
memory after assigning the mesh.
If the option "Mesh from
master to slave" is ticked, then the points in normal
selection will become the 'Master' assignments to which material
and geometric attributes for the joint are then to be
assigned. The points in the selection memory will become
slave points. For a linear joint material the order of master and slave
lines does not matter. The joint interface mesh is described in the help menu item:
Help
> Help Topics > Contents >
Modeller Reference Manual > Chapter 5 : Model Attributes >
Meshing >
Joint/Interface Element Meshes
When assigning the joint mesh attribute
a local coordinate dataset may be specified to orientate the joint
elements, if one is already defined (recommended approach for
controlling joint local axes). After
meshing, the element axes can be visualised using:
TreeView
> Layers tab > Mesh > (check) Show element axes
Geometric properties
are required for the 6-degree-of-freedom (6 DOF) JSH4 elements, but
not for the 3-degree-of-freedom (3 DOF) JNT4 elements. Refer
to the Element Reference Manual for further information regarding
the particular joint elements used. To specify a geometric
attribute for JSH4 elements go to:
Attributes
> Geometric > Joint
to
define a geometric eccentricity, which can be zero unless
otherwise required.
Surfaces should have an appropriate material attribute
assigned (e.g. concrete, steel etc).
The
joint material attribute used controls how the joint
will behave.
Materials appropriate to common uses of joints are described
below; full information on all available joint materials is given
in the Help:
Help
> Help topics > Contents > Theory Manual Volume 1 >
Chapter 4 Constitutive models > 4.12 Joint Models
See
also:
Help
> Help topics > Contents > Modeller Reference
Manual>Chapter 5 : Model Attributes>Material
Properties>Joint Material Properties
For a
simple hinge JNT4 joint with no rotational stiffness:
Attributes
> Material > Joint > (drop down lists) Joint
type=Spring stiffnesses, Freedoms=3
The material needs to be defined with 'Assignment' to
'Lines'.
The
number of "Freedoms" specified in the material should
match the DOF in joint mesh attribute selected. A stiffness value for each
DOF should be entered. For JNT4, Freedom=3 should be used:
the DOF are, in order, local x, y, z. For JSH4, Freedom=6 is
appropriate: the DOF are, in order, local x, y, z, Thx, Thy, Thz.
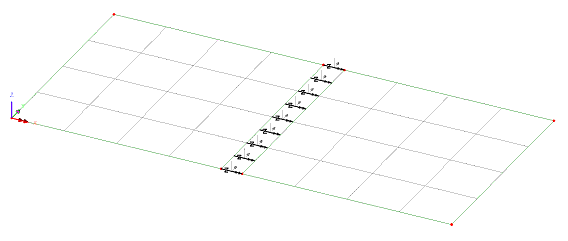
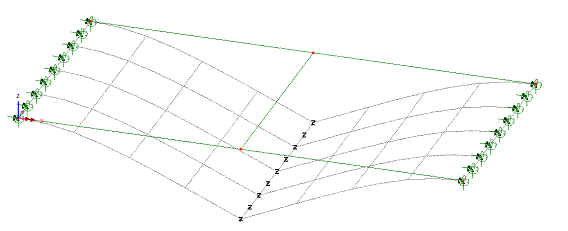
The
image below demonstrates the use of joint elements to create a
hinge connection between two shell surfaces.
For
more information on the calculation of spring stiffnesses, please
see Spring stiffnesses for joints
Ref:
CSN/LUSAS/1017
Joints: Mesh
| Geometric attributes |
Material attributes | Spring stiffnesses |
Supports | Loadcase properties
|